Georeferencing in ArcMap
Oct. 30 2021
Sometimes when you work as part of a Geographic Information System (GIS), you will come to a point where you have a raster and want it in your GIS, but the raster data is not formatted correctly to be dropped in your software as-is. Much of the time it's because your data is 'dumb' and is missing the information needed to work correctly. In other words, there is no way to reference the geographic location of a given point in your raster image. The remedy is to georeference it.
According to the USGS, "Georeferencing means that the internal Coordinate System of a digital map or aerial photo can be related to a ground system of geographic coordinates. A georeferenced digital map or image has been tied to a known Earth Coordinate System, so users can determine where every point on the map or aerial photo is located on the Earth's surface". Personally, I view the act of georeferencing like taking a big fat sticker (your image) and slapping it on the surface of the Earth so the landmarks on the image match the real world locations on the planet's surface. This task is not difficult, but it does require forethought and careful planning to get the results you seek.
The fundamental nature of maps, geodata, and Geographic Information Systems is one of inaccuracy. All the data is abstracted, out of date, and subject to the limitations of our fallen race of humanity. For all that, we do a pretty good job of developing geographic products. There will never be a 1:1 correspondence to the Earth but we can get close. A key part of the georeferencing process is decided how close you want to get, and how close you can realistically get using the data you have. Factors such as the age or compatibility with your GIS and the raster you want to reference will have their say. For the example workflow I am using, I define success as coming to within about ten feet of a given known point based on the original dataset. In this case, this means the Lat/Lon information in the maps we are georeferencing.
In the process of georeferencing a raster image, I see six main steps, from start to finish. These steps are:
Raster Georeferencing
- Gather your rasters and do your research
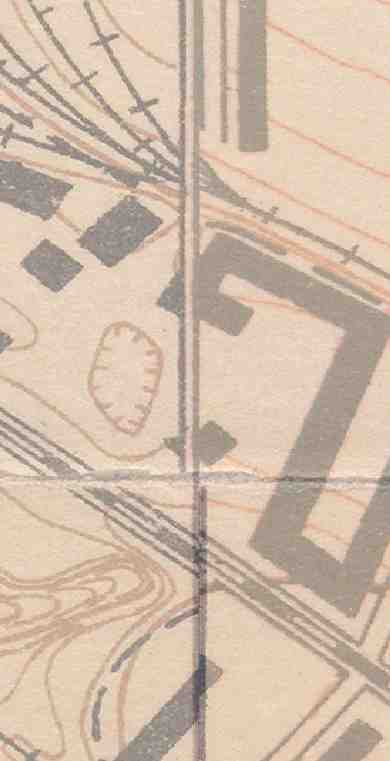
The obvious first step, you need to get a hold of raster images that you want in your GIS, but won't go. Raw images, scanned maps, whatever it is, something without attached geographic information. You need the raw data, and you need to know enough about it to properly develop your reference environment. Understanding the limitations of the medium will also be useful in defining the point where you can call your efforts a success. For myself in this exercise, a community member has supplied me with several high quality scans of very old maps. These maps cover parts of the Trinity River near Dallas, Texas and range in date from 1912-1918. These are maps that were in use, with survey lines developed with hundred year old survey techniques, and there are rips, folds, and faded lines that in the 'real world' correspond to distances of ten to twenty-five feet. Each map is at a scale of 1:12,000 and features Latitude and Longitude lines. With this information, I am beginning to develop a plan of attack and building an idea of where I should draw the line for success.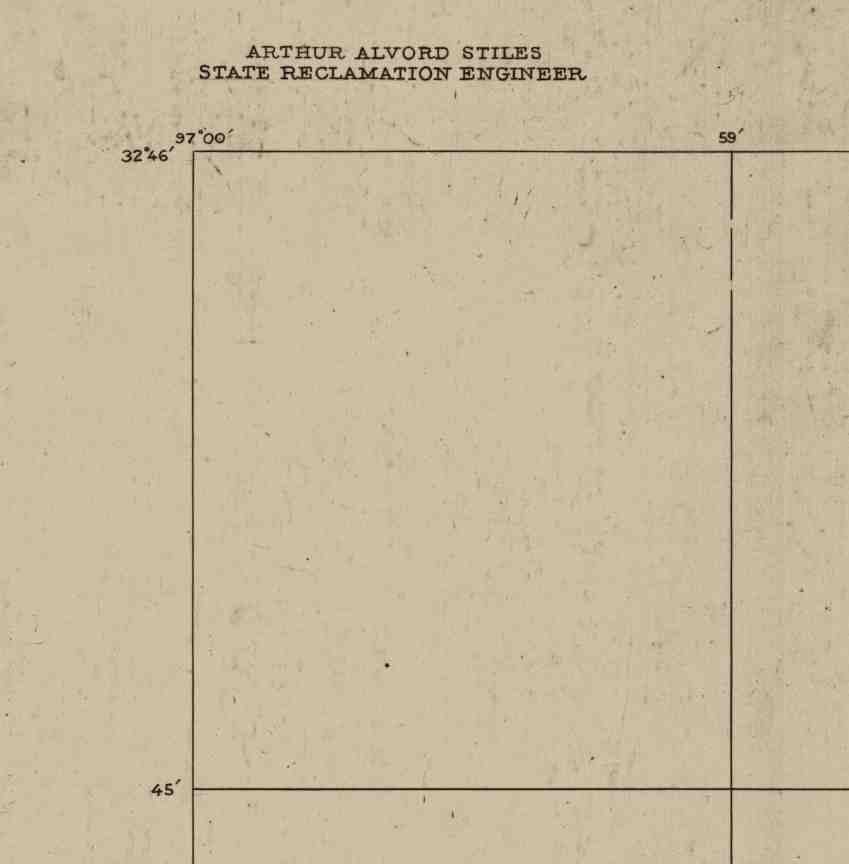 Our secret weapon
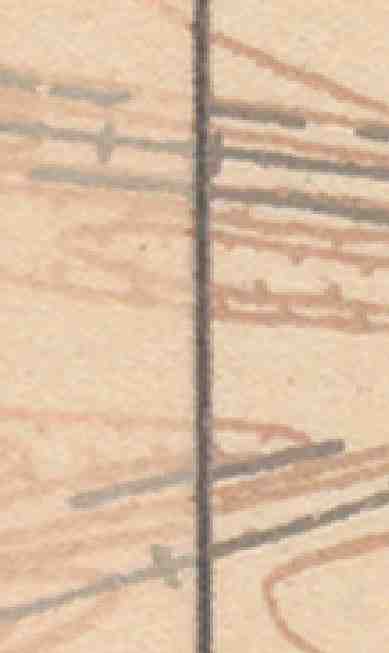
The two most important pieces of information I have, that I see as relevant are the Lat/Lon lines, and the width of those lines on the map. Each map covers several degrees of 'tudinal lines, offering several dozen intersections that I can use to built a network of reference points. These lines and intersections are about ten 'real world' feet apart. What this tells me is that no matter how accurate I wish to get, the chances of being able to get closer than ten feet approach zero. The granularity of these maps are great, but not great enough. Additionally, because it's so old and used techniques and equipment of a similar age, any accuracy past that ten feet may be a 'false accuracy' that is greater than reality allows. With this information, we move to the next step, developing a plan for rubbersheeting. - Develop a plan for rubbersheeting
Back in the day, this process was done on literal sheets of rubber, with maps printed and stretched by hand. Now we do it virtually, with the assistance of advanced mathematics. The basic idea is to build links between known locations in the raster image and the real world. Benchmarks are good, landmarks are okay, but for our purposes we are using the previously mentioned 'tudinal lines. Being aware of our limitations, we know that the lines as they lay on the map may not be perfectly accurate, especially as they are a more abstract form of information than say, a benchmark, but we can determine where these points are in our GIS with excellent accuracy. We can also use them to quite easily build a well distributed network of linkages between the GIS and the unreferenced maps. That forms the core of our georeferencing plan- we will take all those Lat/Lon points on the map, build a shapefile of those same points in the GIS, and stitch our maps to the surface of the Earth.
ArcMap has a feature where lists of X and Y coordinates in a spreadsheet can be imported as a set of points, and with hindsight as our ally, we will use our favorite spreadsheet software to develop a series of X and Y coordinates in Decimal Degrees (DD). As the maps use Degree Minute Second (DMS) we will also have to convert our coordinates. This is trivial in a program such as Excel. 60 Seconds makes a Minute, and 60 Minutes, a Degree. Being North of the Equator, our Latitude will be in positive digits, and being West of the Prime Meridian, our Longitude shall be negative. - Build the reference environment
The 'series fill' feature in Excel is great for this, but however you want to do it, transfer all the Lat/Lon pairs that correspond to the intersections on the map into the spreadsheet. For the particular map sheet I am working with, that is thirty points. Input them as six columns, one for each portion of the pair. That's two columns for Degrees, two for Minutes, and two for Seconds. Then convert to Decimal Degrees in whatever manner you wish. Add a column for features and, if you wish, a column corresponding to the map sheet. This is important if you are doing multiple sheets at once, to better differentiate which points go with which map sheet.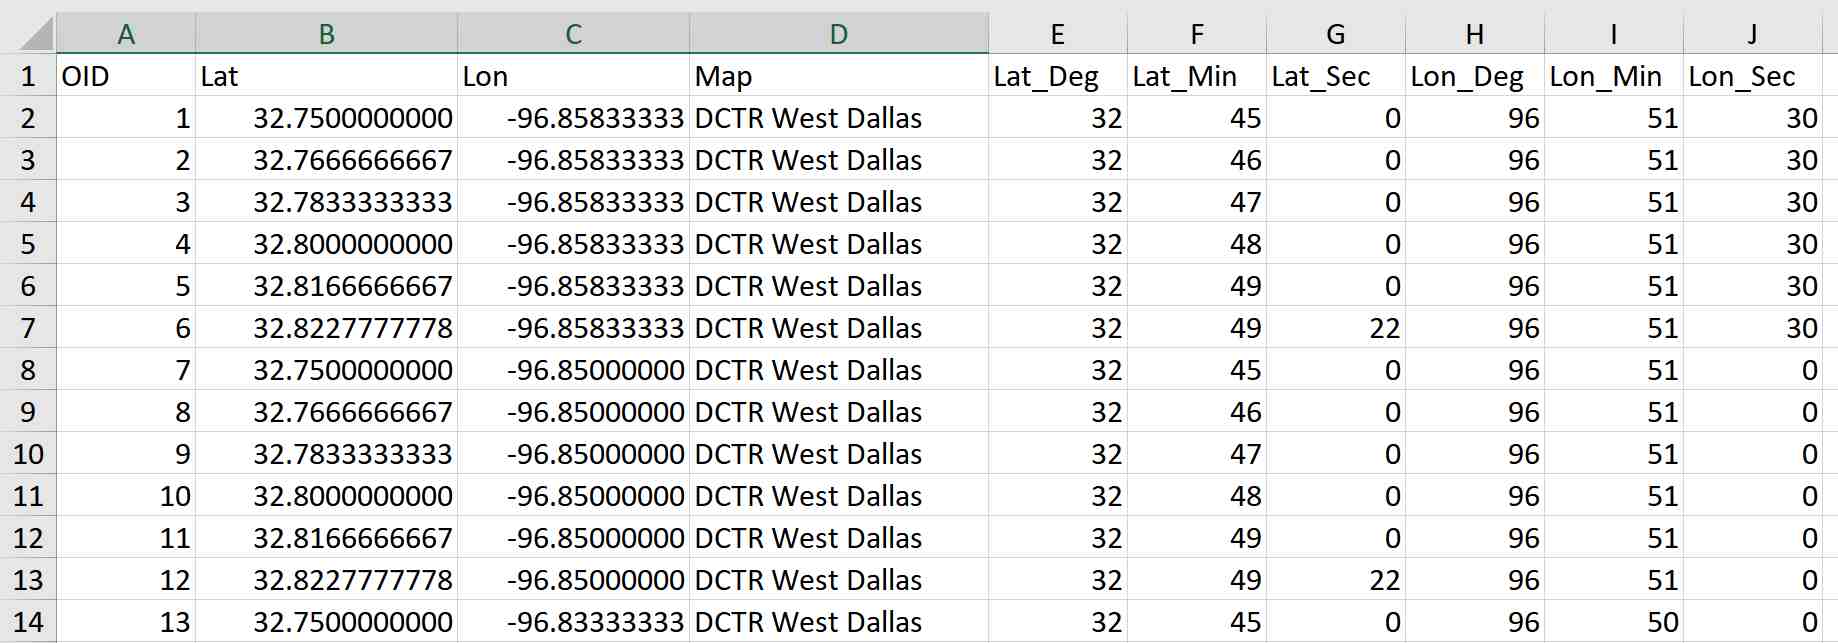 A Sample
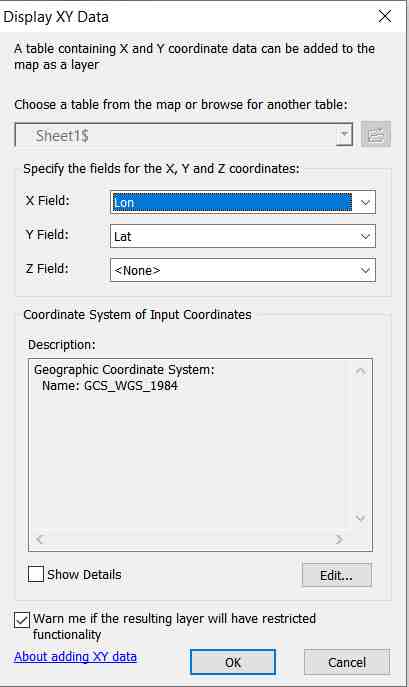
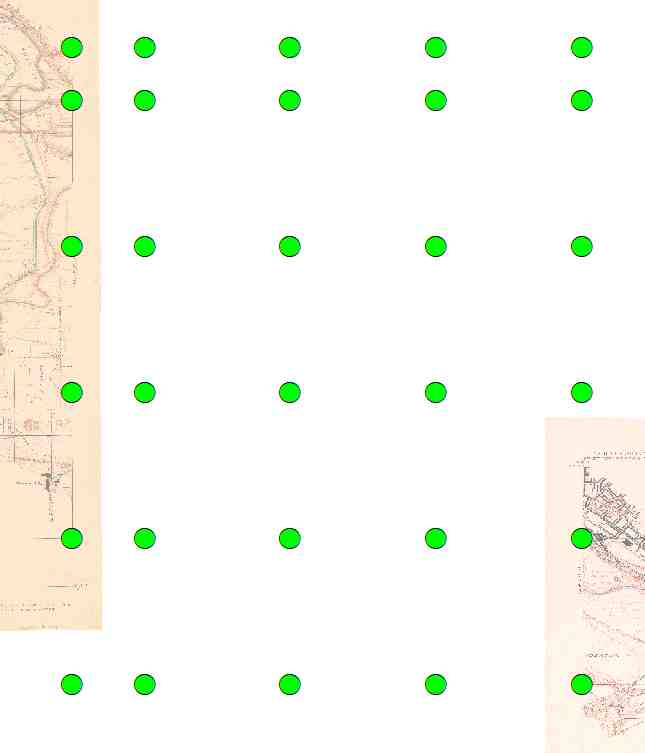
At a minimum, you really should have one column for a feature ID, a column for your Latitude values in Decimal Degrees, and a column for Longitude values, also in Decimal Degrees. Import this into ArcMap as a table. Right click the table, and select the XY data option.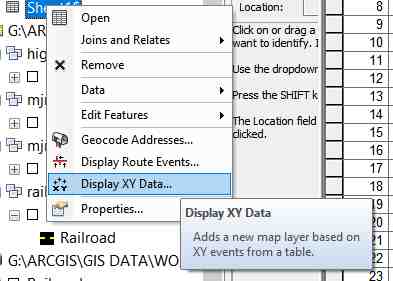 Display XY Data
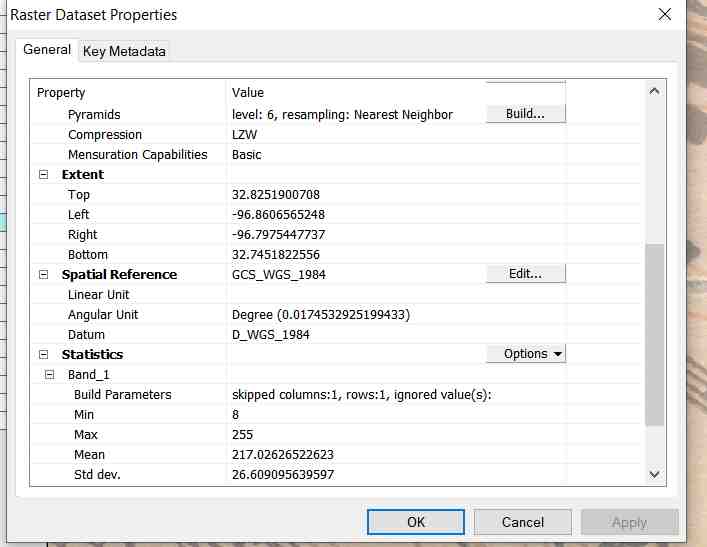
This will bring up a window that should auto populate your Lat/Lon into the X and Y fields. Assign it an appropriate Coordinate System, and click OK. There will likely be some errors related to selecting features, but those can be ignored for now. If you wish, you may export those points into a fully fledged shapefile to assist with those errors. Regardless, you should now have a regular series of points that correspond to the intersections of Latitude and Longitudinal lines on your map. Now the raster must be prepared. In the 'ArcCatalog' pane, navigate to the raster image and open its 'Properties'. Scroll down to the 'Spatial Reference' section, and assign it an appropriate Coordinate System. In this case, I will be doing WGS_1984. Bring it into ArcMap. Now you are ready to begin the georeferencing process. - Build the link network
ArcMap allows georeferencing by building a network of links, where a location on the unreferenced raster is linked to its 'real world' location in the GIS. With snapping enabled, it becomes as simple as clicking on the map, then clicking on one of the points we've created with the spreadsheet. First, right click the white space on the edges of the program where your tools live. This brings up the master list of toolbars, where you can select the 'Georeferencing' toolbar. Under the 'Georeferencing' drop down menu, uncheck 'Auto Adjust'. This will speed things up. Next to the 'Georeferencing' drop down menu there is another drop down menu where you may select the image you want to georeference. Next to it is the linking tool.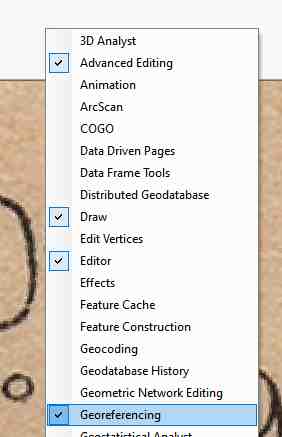 Opening the tool
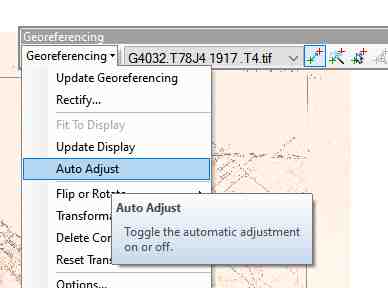 Turning off auto-adjust
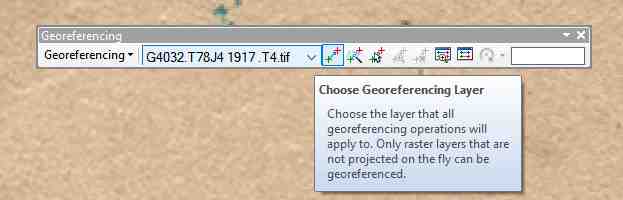 The working layer
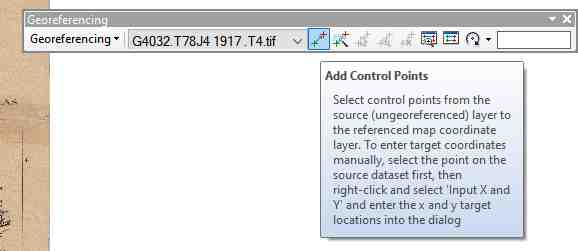 Link builder
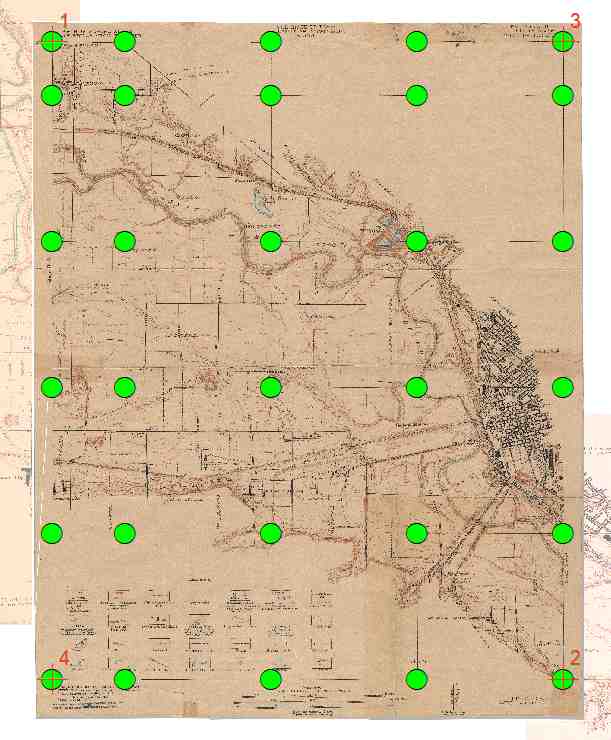
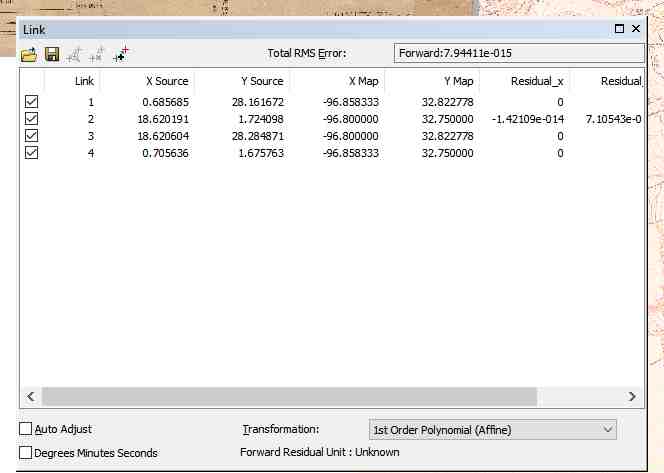
To start building links, zoom to the unreferenced image, select your first linking point, and click. This will create what looks like a string starting at your point, and attached to your mouse. Then you will zoom to your reference points created earlier, and link up with the corresponding point. Do this for the four outermost points, then go back to the georeferencing menu and select 'Update Display'. At this point, you should very roughly have your map in the right place. Your link table contains all the links you have created so far, with stats on each. You should have four of thirty at this point. Go ahead and finish the remaining links. Update the display and do a preliminary check of your work. You can do this by measuring the distance between your control points and where they should be on the map. If you have other referenced maps, like I do, you can match features. Throughout the map I have just done, I am getting errors between zero and ten feet. Some features, such as railroads, match perfectly. Others, such as some Latitude lines and contour lines, are dislocated around ten feet. This is within our margin of error, so feel free to open the 'Georeferencing' menu, and click 'Update Georeferencing'. If you are not satisfied with your results, move to the next step. - Fiddle with settings
At this point, if your georeferencing process has gone less smoothly than you would like, there are some avenues that can be taken to tighten up your work. By changing around the transformation settings at the lower right corner of the link table, some less than ideal raster images can be massaged into a better position. Those transformations offer varying degrees of smushiness, or pixel adjustment of the raster. Disabling certain links that may be out of whack or incorrect could help as well. If fiddling with the Georeferencing settings doesn't help as much as you would like, you will most likely have to backtrack to the start- double check the information you have on your raster images, the projection (or lack thereof), double check that you're building your links well. Common issues I have seen are that a map could be drawn in some one-off projection, or even sketched freehand. I have seen workflows where links were established in the wrong position, and even images that were just... wrong. In some instances the best results available could still be off by quite a bit. This process is more art than science, and ultimately you need to get yourself to a point you are realistically satisfied with. - Check your work
The final step for this process is to double check your work against previously established data to see how close you have gotten in matching up your image to the 'real world'. Because 'tudinal lines are so abstract, a good verification for our work is to find feature data we can match to the map. I cannot provide screenshots for this process as it uses data I don't necessarily have rights to, but I was able to get a good overview of how I did. There are many real world features still extant one hundred years later, and most of the ones I found match up very well to the map, and some did not. Whether that's an error in the map, or features moving in the intervening years, I declare my work to be Adequate. As I mentioned earlier, that's part of the research portion of this workflow, and a testament to what 'realistic' means. It's not like I have access to overhead imagery taken in 1915, so there is a limit to how well accuracy can be verified, but everyone has a point where they are satisfied with their work.

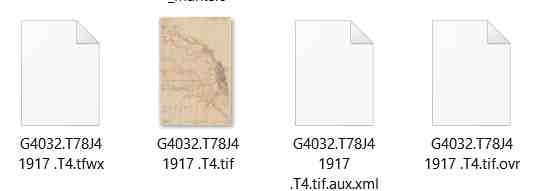
At this point you should have a raster image suitably ensconced within your GIS, referenced and usable for further analysis. For many images, there will be a few extra files in the same folder as your image which contain the referencing information that allows ArcMap to put your image where it belongs. These files can be shared with others to get their data referenced if they have the same image. This is useful if you both have a copy of the same image and don't wish to transfer the whole thing back and forth.
Hopefully this article was helpful in getting you from an unreferenced raster image to something you can use in your GIS. As always, comments and critiques are welcome.
Links:
USGS Georeferencing Page